
 EN
EN
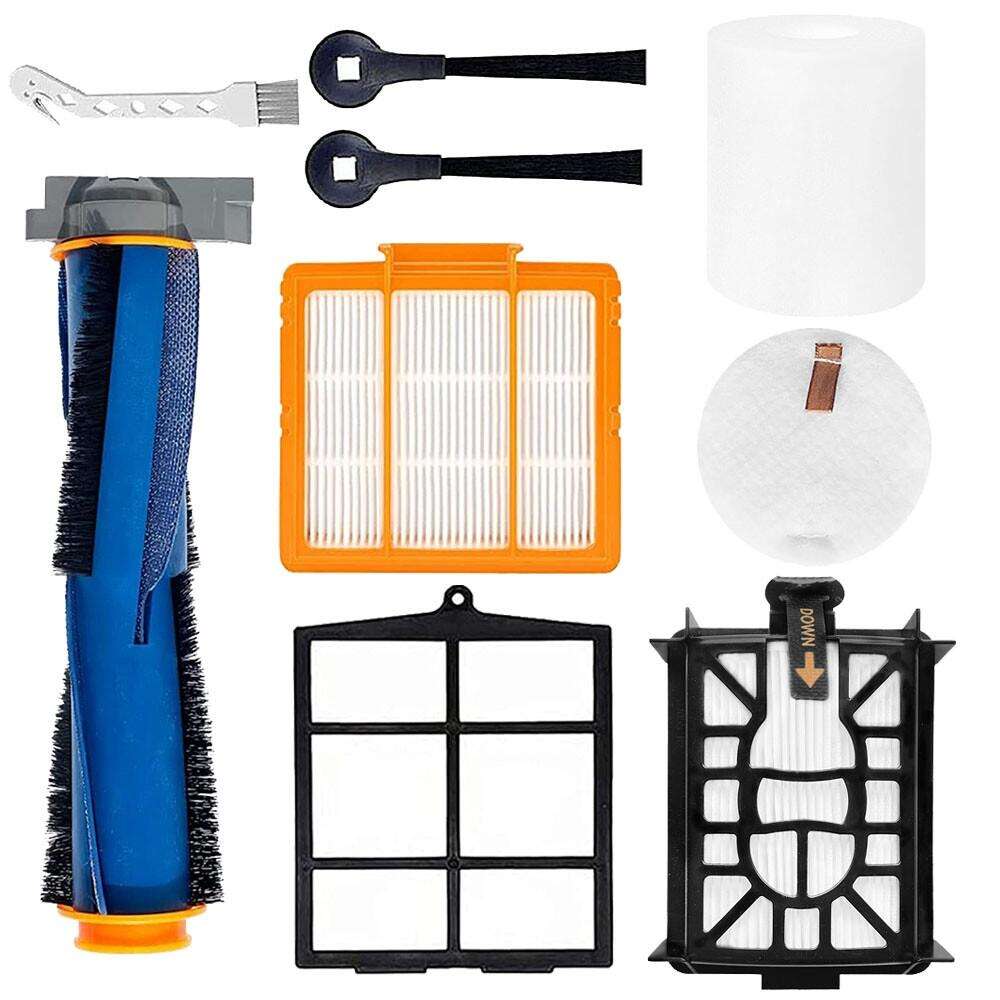
Keeping your robotic floor cleaner running at peak performance over months and years depends almost entirely on how consistently you care for its internal and external components. Many users invest in a quality machine only to watch its suction power fade, its navigation stumble, or its brushes jam — all because the regular upkeep of robot vacuum parts gets overlooked. Understanding what each component does and how to maintain it correctly is the single most effective way to extend the working life of your investment.
The maintenance of robot vacuum parts is not a complex discipline, but it does require a structured routine and a clear understanding of which components wear fastest, which need cleaning versus replacement, and which warning signs should never be ignored. This guide walks through the practical maintenance logic for every major component category — giving you the knowledge to keep your robot vacuum performing efficiently for the long term.
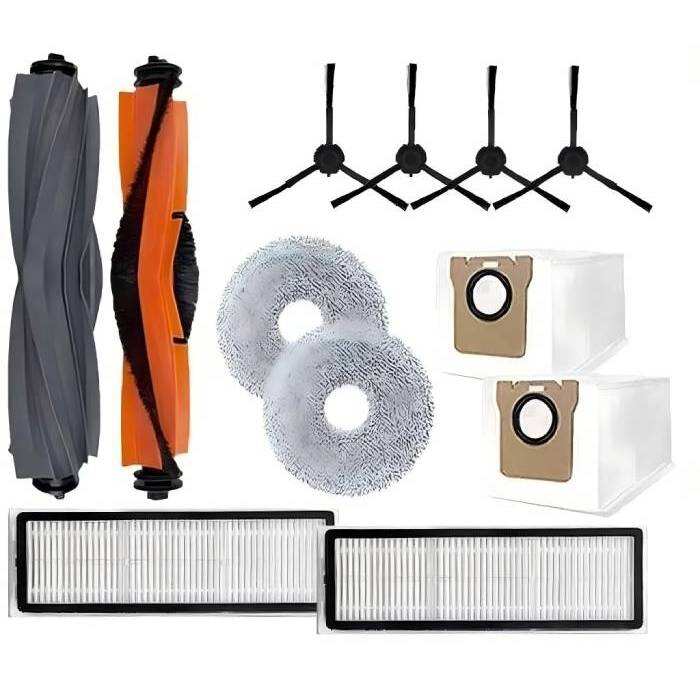
Understanding the Core Robot Vacuum Parts and Their Roles
The Brush System: Side Brushes and Main Roller Brush
The brush system is the most mechanically active part of any robot vacuum, which means it also accumulates wear and debris faster than almost anything else. Side brushes spin outward to sweep particles toward the suction path, while the main roller brush agitates carpet fibers and dislodges debris from hard floors. Both are among the robot vacuum parts most directly exposed to the full range of household debris — hair, dust, grit, and fibers.
When side brushes become bent, worn, or clogged with tangled hair, they lose their sweeping radius and leave strips of debris uncollected along the edges of rooms. The robot effectively under-cleans without the user realizing it until they inspect the floors manually. A regular visual check after every few cleaning cycles is all it takes to catch this early.
The main roller brush, especially on units that use rubber blade or bristle designs, should be removed and inspected at least once a week in households with pets or long hair. Hair wraps tightly around the brush axle and bearings, creating resistance that strains the motor and reduces rotation speed. Removing wrapped hair with a seam ripper or cleaning tool prevents the kind of silent mechanical stress that shortens motor lifespan significantly.
The Suction Motor and Dustbin Assembly
The suction motor is one of the robot vacuum parts that users least often think about during routine maintenance — yet it is the component most directly affected by neglect elsewhere. When filters clog and dustbins overfill, the motor works harder to maintain airflow, generating excess heat and accelerating wear on the internal fan blades.
The dustbin itself should be emptied after every cleaning session in high-debris environments, and at minimum every two to three sessions in lighter-use households. A full dustbin does not just reduce cleaning performance — it pushes fine particles back through the filter and into the motor pathway, compounding the problem over time.
When cleaning the dustbin, avoid using water unless the manufacturer explicitly states the component is washable. Moisture trapped inside a plastic dustbin can cause bacterial growth and odors that are difficult to eliminate, and in some designs it can warp the bin's seating, compromising the airtight fit needed for proper suction.
Filter Maintenance: The Most Overlooked Step
How Filter Condition Affects the Whole System
Filters are among the robot vacuum parts that most directly determine whether the machine is genuinely cleaning the air or simply redistributing fine particles. Most modern robot vacuums use HEPA-style or multi-layer filters designed to trap dust mite matter, pet dander, and fine allergens. When these filters saturate with trapped material, airflow drops sharply, suction weakens, and the motor begins to compensate by drawing more current.
A partially clogged filter does not just reduce cleaning effectiveness — it also acts as a source of odor, especially in homes with pets. The biological matter trapped in the filter continues to off-gas as the machine runs warm, and users often misattribute this smell to a dirty floor rather than a filter that needs attention.
For most robot vacuum models, the manufacturer recommendation is to tap the filter clean over a waste bin every week and replace it entirely every two to three months under normal use, or monthly in high-pet or high-allergen environments. Following this schedule keeps airflow consistent and protects the motor from unnecessary load.
Washing vs. Replacing Filters
Some robot vacuum parts are designed for periodic washing, and some filters fall into this category — but it is critical to check the model specifications before washing any filter. Washing a non-washable filter collapses the filter media structure, creating gaps that allow fine particles to pass through uncaptured. The filter may look cleaner after washing, but its actual filtration efficiency can drop dramatically.
Washable filters must be dried completely — typically for 24 hours — before reinstallation. Reinstalling a damp filter traps moisture in the motor assembly and filter chamber, which can cause electrical faults and mold growth inside one of the machine's most sensitive areas.
When genuine replacement filters are available for a specific model, using them is nearly always the better long-term choice over attempting to wash and extend the life of an aging filter beyond its designed service life. Genuine robot vacuum parts are engineered to fit and perform precisely — aftermarket alternatives may not seal properly in the filter housing.
Sensor and Navigation Component Care
Cliff Sensors, Obstacle Sensors, and Camera Lenses
Modern robot vacuums rely on an array of sensors to navigate rooms, avoid obstacles, and prevent falls from stairs or elevated surfaces. These robot vacuum parts are electronic and optical in nature, which means they do not wear in the mechanical sense — but they do degrade in performance when dust and grime accumulate on their surfaces.
Cliff sensors on the underside of the robot are particularly vulnerable to dust buildup. When these sensors become dirty, the robot may hesitate at floor transitions, refuse to enter certain rooms, or — in the worst case — misjudge a surface change and drive off an edge. Wiping the cliff sensors with a dry microfiber cloth once a week is a simple step that prevents a disproportionate share of navigation errors.
For robot vacuums equipped with LiDAR towers or camera-based navigation systems, the optical components require gentle, regular cleaning. A small amount of lens-cleaning solution on a soft cloth is sufficient to remove the fine film of dust that builds up on these surfaces over time. Avoid using paper towels or abrasive materials, which can create micro-scratches that scatter light and degrade navigation accuracy.
Wheel Modules and Underbody Contacts
The drive wheels and their suspension modules are robot vacuum parts that rarely fail outright but frequently underperform due to debris accumulation. Hair and thread wrapping around the wheel axles creates friction that makes one wheel drag slightly, causing the robot to veer off course and clean inefficient, overlapping paths.
Most drive wheel modules can be popped out of their housing with gentle pressure for cleaning. Once removed, the axle area should be cleared of any wrapped material, and the wheel tread should be wiped clean of any compressed debris that could affect traction on smooth floors.
The charging contacts on both the robot and the docking station are another set of robot vacuum parts that degrade quietly. Oxidation and dust buildup on these metal contacts cause inconsistent charging, which in turn leads to shortened cleaning runs and confused battery management behavior. A weekly wipe with a dry cloth keeps these contacts clean and ensures reliable charging every cycle.
Battery Management and Long-Term Care
Charging Habits That Protect Battery Health
The battery is among the robot vacuum parts with the most finite service life, and how it is managed day-to-day has a direct impact on how many cleaning cycles it will reliably support over its lifetime. Most robot vacuums use lithium-ion battery packs, which perform best when kept between roughly 20% and 80% charge for daily use, rather than being cycled from full to empty repeatedly.
Leaving the robot on the dock continuously between uses is appropriate for most modern units, which include battery management circuits to prevent overcharging. However, for models that do not include this protection, or for units stored unused for extended periods, it is advisable to charge the battery to approximately 50% and store the robot in a cool, dry location rather than leaving it on the dock indefinitely.
When the battery begins to show significant capacity loss — manifesting as noticeably shorter cleaning runs than when the unit was new — it is time to consider replacement. A degraded battery forces the robot to return to dock mid-clean, splitting cleaning sessions and leaving uncleaned zones. Replacing the battery restores full-session coverage and is far more cost-effective than replacing the entire unit.
Recognizing When Robot Vacuum Parts Need Replacement Rather Than Cleaning
Maintenance extends life, but every component has a service threshold beyond which cleaning no longer restores performance. For roller brushes, visible deformation of the bristles or rubber blades, persistent tangling despite regular cleaning, and audible grinding from the brush motor are all indicators that replacement is the appropriate next step rather than another cleaning session.
Side brushes that are visibly splayed outward, bent at unusual angles, or missing bristle clusters have passed their effective service life. No amount of straightening will restore the precise sweep geometry these robot vacuum parts need to collect debris efficiently from corners and edges.
Filters that have been cleaned repeatedly and still cause audible suction loss, or that have developed tears or holes in the filter media, must be replaced. The cost of a replacement filter is negligible compared to the cost of motor damage caused by running the vacuum with compromised filtration over an extended period.
Building a Sustainable Maintenance Schedule
Daily and Weekly Tasks
An effective maintenance routine for robot vacuum parts does not require significant time — it requires consistency. The most impactful daily habit is emptying the dustbin after each cleaning session. This single step prevents the cascade of problems that stem from operating with a full or near-full bin, including reduced suction, filter overloading, and motor stress.
On a weekly basis, the routine should include removing and clearing the roller brush of wrapped hair, wiping the cliff and obstacle sensors with a dry cloth, checking the side brushes for deformation or excessive tangling, and wiping the charging contacts on both the robot and the dock. This weekly round takes under ten minutes but meaningfully extends the service life of the machine's most active robot vacuum parts.
Checking the filter weekly — even if replacement is only needed monthly — allows you to tap loose dust from the filter media and keep airflow resistance low. This is especially important during high-shedding seasons in pet households, where filter saturation can occur much faster than the standard replacement interval suggests.
Monthly and Seasonal Checks
On a monthly basis, the full brush module should be removed and cleaned thoroughly, including the brush end caps and bearing housings where debris tends to compact invisibly. The wheel modules should also be removed and inspected for axle debris at this interval. A quick inspection of the underside for any cracked housing, loose components, or accumulated debris in the sensor wells rounds out the monthly check.
Seasonally — or approximately every three months — it is appropriate to assess which robot vacuum parts are approaching the end of their recommended service life and prepare replacements. This includes filters, side brushes, and roller brushes. Having genuine replacement components on hand before they fail completely ensures zero interruption to your cleaning schedule and prevents the temptation to continue running the vacuum on degraded components.
Keeping a simple maintenance log, even just a note in a phone calendar, removes the guesswork from this process. With a clear record of when components were last cleaned or replaced, decisions about when to act become straightforward rather than based on guesswork or vague recollection.
FAQ
How often should I replace the main roller brush on my robot vacuum?
Under normal household use, the main roller brush should be inspected every week and replaced approximately every six to twelve months depending on floor type and debris load. Homes with pets or long-haired occupants typically need replacement closer to every six months. If you notice reduced pickup performance or hear grinding from the brush motor despite regular cleaning, replacement is warranted regardless of the time interval.
Can I use water to clean robot vacuum parts?
Some robot vacuum parts are washable and some are not — the distinction matters significantly. Dustbins and washable filters can be rinsed with water, but must be dried completely before reinstallation. The main roller brush, electronic sensor windows, motor assembly, and battery compartment must never be exposed to water. Always consult the specific model's documentation before introducing any moisture to any component.
Why does my robot vacuum lose suction even after I empty the dustbin?
Suction loss after emptying the dustbin is almost always caused by a clogged or saturated filter, a blocked suction inlet, or debris wrapped tightly around the roller brush restricting its rotation. Check and clean the filter first, then inspect the suction pathway from the brush housing to the dustbin port for any blockages. If suction remains poor after these steps, the motor may be under stress from prolonged operation with a clogged filter and may need professional assessment.
How do I know when it is time to replace the battery in my robot vacuum?
The most reliable indicator is a noticeable reduction in run time per charge cycle compared to when the unit was new. If your robot vacuum consistently returns to dock mid-clean in rooms it previously completed fully, or if the battery indicator drops rapidly from full to low within a short cleaning period, the battery cells have degraded beyond effective capacity. Most robot vacuum batteries are rated for 300 to 500 full charge cycles, after which capacity loss becomes functionally significant.